

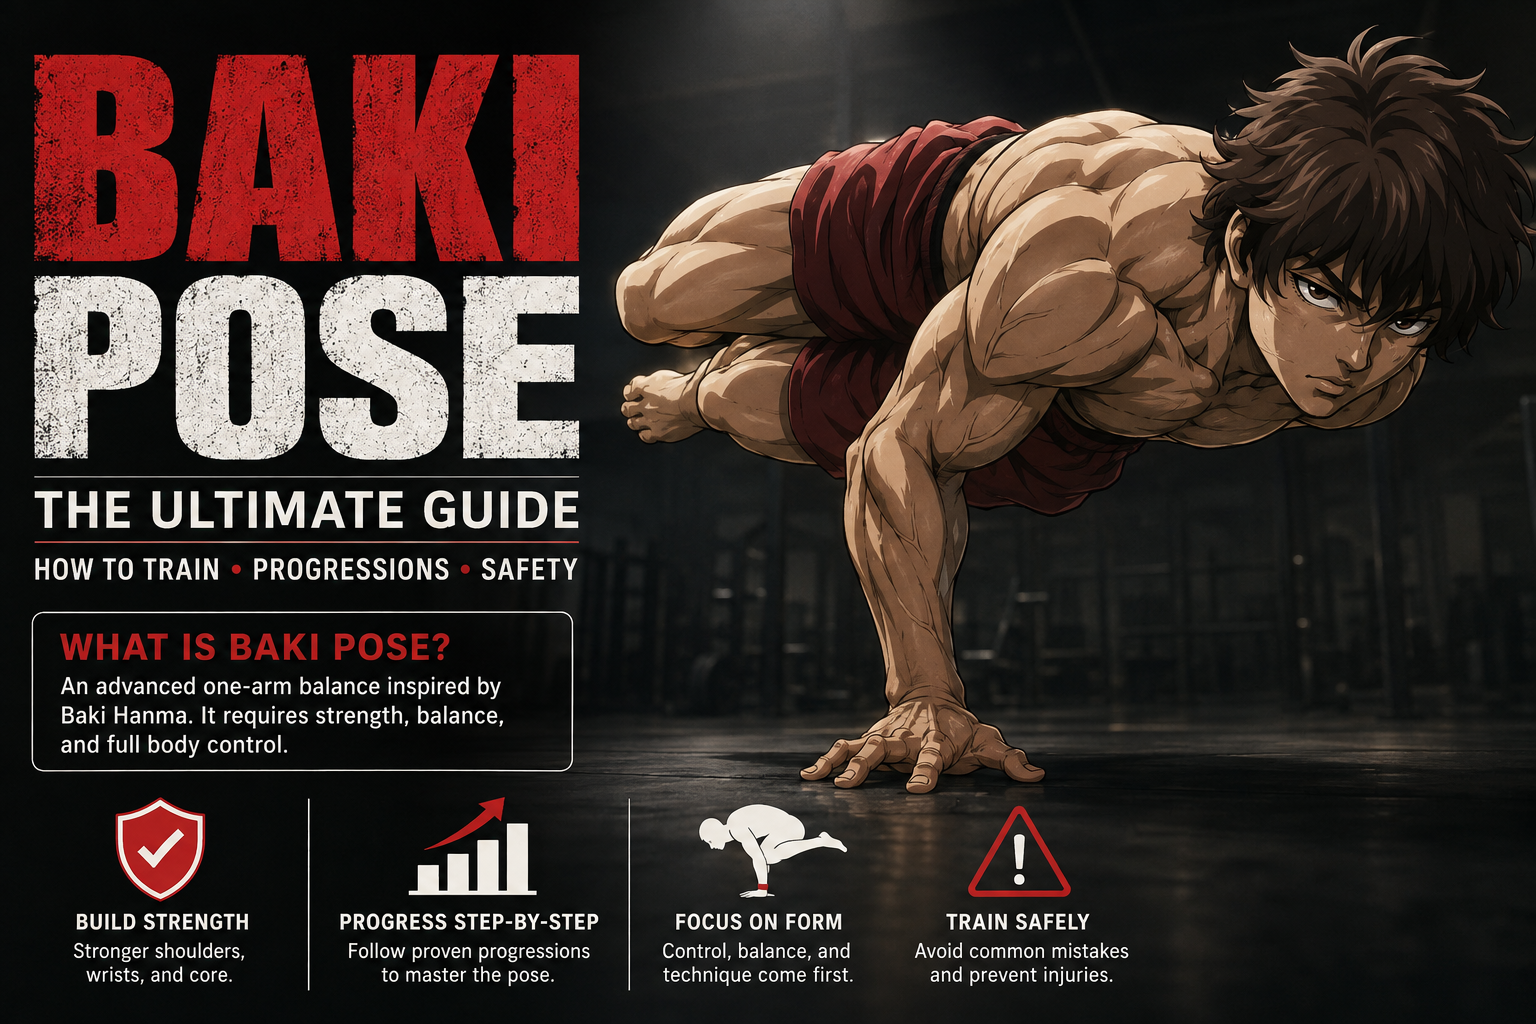
Baki Pose: What It Is, How to Train for It, and Do It Safely
The Baki pose is the dramatic, gravity-defying body position associated with Baki Hanma, the martial-arts protagonist of the Baki franchise. Online, the term usually refers to a viral one-arm balancing challenge in which the body is lifted from the floor while the legs remain suspended.
It looks effortless in anime. In real life, it is anything but.
The pose demands substantial wrist tolerance, shoulder stability, pushing strength, core control, balance, and body awareness. Although social-media clips can make it look like a trick anyone can learn quickly, the safest approach is to treat it as an advanced calisthenics skill rather than a casual photo pose.
What Is the Baki Pose?
The Baki pose is an advanced one-arm balance inspired by Baki Hanma and popularized through anime fandom and online fitness challenges. It is commonly described as a side-crow-like position, although real-world attempts vary considerably in leg position, torso angle, and the amount of arm support used.
The pose comes from the broader Baki universe created by Keisuke Itagaki. Baki Hanma is depicted as an elite fighter relentlessly training to surpass his father, Yujiro Hanma; Netflix classifies the modern adaptations as martial-arts and mixed-martial-arts anime based on the manga.
Quick Facts
| Feature | Baki Pose |
|---|---|
| Difficulty | Advanced |
| Primary skill | One-arm body balance |
| Main demands | Wrist strength, shoulder stability, core tension, balance |
| Closest training styles | Calisthenics, arm balances, gymnastics-style strength |
| Traditional yoga pose? | No |
| Beginner-friendly? | No |
| Typical goal | Hold the body suspended with minimal support |
| Main risk areas | Wrist, elbow, shoulder, and falls |
One important distinction is often missed: there is no universally standardized real-world Baki pose.
Anime artwork is not a biomechanics manual. Different creators reproduce the image differently, so chasing an exact joint angle is usually less useful than developing the strength and control needed to create the recognizable silhouette safely.
Why Did the Baki Pose Become So Popular?
The appeal is easy to understand: the position looks nearly impossible.
It combines three ingredients that perform exceptionally well on social media:
- A recognizable anime reference
- An obvious strength challenge
- A pose that creates an immediate “How is that possible?” reaction
By 2022, calisthenics creators were already publishing widely viewed Baki pose tutorials and challenge videos, helping transform the anime reference into a mainstream fitness stunt.
Unlike a conventional push-up or pull-up, viewers do not need fitness knowledge to recognize its difficulty. The visual instantly communicates strength and balance.
Is the Baki Pose Actually Possible?
Yes, versions of it are physically possible.
What is misleading is the assumption that everyone attempting the “same” pose is performing an identical movement. Hand placement, hip height, leg angle, elbow position, body proportions, camera angle, and momentum can dramatically change the difficulty.
Real-world variations often resemble a combination of advanced arm balancing and calisthenics rather than a single established exercise. Fitness and yoga-focused explanations commonly compare it with side crow and other one-arm balance progressions.
Baki Pose vs. Side Crow vs. Planche
| Movement | Typical Support | Body Position | Main Challenge | Relative Difficulty |
|---|---|---|---|---|
| Side crow | Two hands | Legs rotated to one side | Balance and arm support | Intermediate |
| Planche | Two hands | Body extended horizontally | Extreme straight-arm pushing strength | Advanced |
| Baki pose | Often one dominant arm | Hips and legs lifted at an angle | Balance, strength, coordination | Advanced |
| One-arm planche | One hand | Body extended horizontally | Exceptional straight-arm strength | Elite |
The comparison is useful for training, but the movements are not interchangeable.
Someone who can perform side crow may still lack the unilateral shoulder strength required for the Baki pose. Likewise, someone with strong pressing muscles can fail immediately if their balance and wrist conditioning are poor.
What Muscles Does the Baki Pose Use?
The movement is better understood as a full-body tension skill than an isolated arm exercise.
Several regions have to work simultaneously.
Shoulders
The supporting shoulder helps stabilize your upper body while your center of mass shifts away from a normal two-handed base.
Weak shoulder control is one reason people collapse even when their arm strength seems adequate.
Chest and Triceps
Your pushing muscles contribute to maintaining the support position and resisting unwanted elbow movement.
However, simply having a strong bench press does not guarantee success because balance strength is highly specific.
Wrists and Forearms
Your hand is the foundation of the pose.
The wrist experiences substantial loading while the fingers and forearm muscles make continuous micro-adjustments to prevent tipping.
Core
Your abdominal muscles and surrounding trunk musculature help prevent the body from folding unpredictably.
Strong core compression can also make it easier to control the legs while shifting weight toward the supporting arm.
Hips and Legs
Although the legs are not carrying body weight, their position determines where your center of mass travels.
Poor leg control can turn a manageable balance into an immediate fall.
Who Should Not Attempt the Full Baki Pose Yet?
Being generally fit is not the same as being prepared for advanced arm balancing.
Do not rush directly into the full position if you cannot comfortably support your weight through your hands or if you experience pain during basic progressions.
Extra caution is appropriate if you currently have problems involving your:
- Wrists
- Elbows
- Shoulders
- Neck
- Back
Existing injuries or persistent joint pain warrant professional medical or rehabilitation guidance rather than experimentation with a viral challenge.
Prerequisites Before Training the Baki Pose
There is no official strength test for the movement, but practical prerequisites can reduce unnecessary trial and error.
Before emphasizing one-arm attempts, aim to become comfortable with foundational skills such as:
- Stable plank positions
- Controlled push-ups
- Crow or similar two-hand balances
- Side-crow progressions
- Wrist-loading drills
- Uneven or assisted arm balances
- Slow weight shifts between the hands
These are not arbitrary exercises.
They teach the specific skill most beginners underestimate: moving your center of gravity without panicking or collapsing through the shoulder.
How to Train for the Baki Pose
Trying the finished pose repeatedly is rarely the fastest route to learning it.
A progression-based approach lets your connective tissues, nervous system, balance, and strength adapt together.
Step 1: Prepare Your Wrists
Warm wrists gradually rather than immediately putting your entire body weight through one hand.
Useful preparation can include:
- Gentle wrist circles
- Palm-supported rocking
- Controlled forward weight shifts
- Light fingertip-pressure drills
- Quadruped wrist loading
Nothing should produce sharp pain.
The goal is preparation, not exhausting your wrists before practice begins.
Step 2: Build a Strong Two-Hand Base
Start with both hands firmly on the floor.
Practice moving your shoulders slightly forward, backward, and sideways while maintaining active pressure through your hands.
Think of your fingers as brakes. Pressing through different parts of the hand allows small corrections before your body moves too far off balance.
Step 3: Learn Crow Balance
Crow teaches you to become comfortable placing significant body weight through your arms while your feet leave the ground.
Do not worry about impressive hold times initially. Controlled entries and exits are more valuable than surviving a shaky 20-second hold.
Step 4: Progress Toward Side Crow
Side crow introduces rotation and asymmetrical loading.
That makes it particularly useful because the viral Baki pose is usually represented with the body offset rather than perfectly centered above both hands.
Step 5: Practice Controlled Weight Shifts
From a secure two-hand balance, gradually transfer more pressure toward one side.
Do not immediately lift the opposite hand.
First learn what 60%, 70%, or 80% of your body weight on one arm feels like while the other hand remains available for assistance.
Step 6: Reduce Assistance
Once you can maintain the shifted position without collapsing, lighten the assisting hand.
Progress might look like:
- Full palm support
- Fingertip assistance
- One or two fingers
- Brief hand release
- Longer unsupported holds
Reducing assistance incrementally is usually more productive than repeatedly launching into uncontrolled one-arm attempts.
Step 7: Refine the Baki Silhouette
Only after the balance itself feels stable should you obsess over appearance.
Experiment gradually with:
- Hip height
- Knee extension
- Leg separation
- Torso rotation
- Head position
The recognizable Baki pose should be the result of control—not a shape you force yourself into before you have the underlying strength.
A Simple Baki Pose Progression
A useful training ladder looks like this:
Floor support → crow → side crow → shifted side crow → fingertip-assisted balance → brief one-arm hold → controlled Baki pose
Do not move to the next stage simply because you succeeded once.
A better benchmark is repeatability. If you can enter and leave a progression under control across several attempts, you probably own the skill rather than merely surviving it.
Common Baki Pose Mistakes
Most failed attempts are not caused by a mysterious lack of talent.
They come from predictable technical errors.
1. Trying the Full Pose on Day One
This is the most obvious mistake and one of the most common.
Your muscles may be strong enough to survive an attempt while your wrists and stabilizing structures are not conditioned for the same load.
2. Jumping Into the Balance
Momentum can briefly create the appearance of control.
It also makes it harder to distinguish genuine balance from a lucky freeze-frame.
A controlled entry is the better test.
3. Ignoring the Supporting Shoulder
Allowing the shoulder to collapse passively makes the entire structure less stable.
Think about actively pushing the floor away instead of hanging from the joint.
4. Looking Only at the Arm
Your legs can make or break the pose.
A small leg movement far from your supporting hand can significantly shift your overall balance.
5. Training on a Hard, Cluttered Surface
Falls are part of learning advanced balances.
Create enough clear space that losing balance does not mean hitting a table, weight rack, or sharp furniture.
6. Continuing Through Joint Pain
Muscular effort and joint pain are not the same signal.
Sharp or escalating wrist, elbow, or shoulder pain is a reason to stop rather than prove your commitment.
7. Copying Anime Anatomy Too Literally
Baki’s exaggerated musculature and movement are part of the franchise’s visual style.
Trying to force your real joints into an illustrated angle simply because a screenshot looks that way is unnecessary.
Train the movement your anatomy can control.
How Often Should You Practice?
Advanced balance skills respond well to consistent, high-quality exposure.
That does not mean maxing out every day.
Short technical sessions performed while you are relatively fresh are usually more useful than endless attempts after your arms are exhausted.
A practical session might contain:
- Wrist preparation
- Two-hand balance practice
- Several weight-shift sets
- Assisted one-arm attempts
- A small number of high-quality full attempts
Stop when technique deteriorates noticeably.
Balance practice becomes much less productive once fatigue causes every attempt to turn into a fight for survival.
Strength Training That Can Help
You do not need a bodybuilding-sized exercise list.
Prioritize movements that improve useful qualities for the pose.
Push-Ups
Build general pushing strength and teach whole-body tension.
Progress toward harder variations only while maintaining controlled form.
Pike Push-Ups
These increase the demand on the shoulders and can help develop stronger overhead-style pushing mechanics.
Planks and Hollow Holds
These improve the ability to maintain trunk tension instead of allowing the hips and legs to move independently.
Crow and Side-Crow Holds
These are among the most movement-specific options because they combine strength and balance.
Scapular Control Drills
Learning to actively push through the shoulder girdle improves stability in hand-supported positions.
Unilateral Weight Shifts
These bridge the gap between two-arm strength and true one-arm balance.
That specificity matters more than simply adding heavier conventional lifts.
How Long Does It Take to Learn the Baki Pose?
There is no meaningful universal timeline.
Your progress depends on factors including:
- Current calisthenics experience
- Arm-balance experience
- Body weight
- Limb proportions
- Wrist tolerance
- Shoulder strength
- Mobility
- Training frequency
- Previous injuries
- Technical coaching
Someone experienced in gymnastics, breakdancing, yoga arm balances, or advanced calisthenics may adapt quickly.
A beginner may need considerably longer just to build the prerequisite strength.
Treat “learn the Baki pose in seven days” content as entertainment rather than a deadline.
Can You Fake the Baki Pose for a Photo?
You can recreate the visual without performing the hardest possible version.
For cosplay or photography, that can be the smarter option.
Consider:
- Keeping the second hand lightly supported outside the camera frame
- Using a low platform beneath the legs
- Choosing an angle that emphasizes the silhouette
- Photographing a safer two-hand variation
- Shooting close to the ground
- Using burst mode to capture a brief controlled position
There is no fitness prize for getting injured while reproducing fictional artwork.
If your goal is a great image rather than a strength achievement, optimize for the image.
Baki Pose Photography Tips
Once you can perform a stable version, presentation matters.
Use a Side or Three-Quarter Angle
The pose reads more clearly when viewers can see the relationship between your supporting arm, torso, and suspended legs.
Keep the Background Simple
A cluttered gym floor can make even an impressive hold difficult to understand visually.
Contrast between your body and the background improves the silhouette.
Shoot at Body Level
A camera placed extremely high can flatten the pose and hide how far your legs are actually off the ground.
Lower viewpoints usually emphasize elevation better.
Prioritize Control Over Facial Expression
Trying to imitate Baki’s intensity is easier once you are not desperately trying to avoid falling.
Master the position first. Add the character afterward.
Baki Pose vs. Baki Fighting Stance
Search results for “Baki pose” can occasionally refer to Baki Hanma’s broader fighting posture rather than the viral one-arm challenge.
They are not the same thing.
The viral Baki pose usually refers to the floor-based one-arm balance. A Baki fighting stance refers more generally to the combat-ready postures associated with the character.
If you are looking for drawing references, cosplay, or character artwork rather than calisthenics training, the distinction can save considerable time.
Why the Pose Looks Harder Than Many Strength Exercises
Traditional strength exercises usually provide a relatively stable base.
The Baki pose does the opposite.
Your base of support becomes extremely small while your body mass extends in several directions away from the hand. That means strength alone cannot solve the problem; your nervous system must constantly detect and correct tiny changes in balance.
This is why a visibly muscular athlete can struggle while a lighter, experienced arm-balancing athlete succeeds.
The movement rewards relative strength and coordination, not simply muscle size.
The Most Efficient Way to Improve
The fastest useful improvement usually comes from identifying your limiting factor rather than doing more random attempts.
Ask yourself what fails first:
- Wrists hurt: reduce loading and improve conditioning.
- Shoulder collapses: strengthen active support.
- Feet immediately drop: improve core and hip control.
- You fall sideways: practice smaller weight shifts.
- You cannot remove the second hand: use fingertip-assisted progressions.
- You can hold it but cannot reproduce it: work on consistent setup and entry technique.
This diagnostic approach is more productive than blaming “balance.”
Balance is not one skill. It is the result of several systems working together.
Frequently Asked Questions
Is the Baki pose real?
Yes. Athletes and calisthenics practitioners can reproduce real-world versions of the pose, although the exact difficulty changes depending on technique and body position.
Is the Baki pose a yoga pose?
Not formally.
It resembles advanced yoga arm balances such as side crow, but the internet challenge is an anime-inspired movement rather than a traditional named asana.
Is the Baki pose dangerous?
It can be risky when attempted without appropriate preparation because a substantial amount of body weight may be supported through one wrist and shoulder while falling remains possible. Fitness coverage of the challenge has similarly emphasized caution for inexperienced practitioners.
Can beginners do the Baki pose?
Most true beginners should build foundational pushing, wrist-loading, and two-hand balance skills first.
A modified or assisted version is a more sensible starting point.
Do you need to be extremely muscular?
No.
Large muscles are not a requirement, but sufficient relative upper-body strength and excellent body control are important.
Can I learn it without doing side crow?
Possibly, especially if you already have advanced calisthenics or gymnastics experience.
For most people, however, side-crow-style progressions offer a useful way to become comfortable with asymmetrical arm balancing.
Why can’t I lift my second hand?
Usually because your center of mass has not moved far enough over the supporting hand.
Instead of rapidly pulling the second hand away, progressively decrease the pressure it provides until it becomes almost unnecessary.
How long should I hold the pose?
A clean two- or three-second hold is more meaningful than a longer position achieved with collapsing joints or uncontrolled movement.
Build duration only after your entry and exit are consistent.
Final Thoughts
The Baki pose became popular because it turns an exaggerated anime image into an irresistible real-world challenge. Its appeal is obvious: it looks spectacular, requires genuine athleticism, and tests much more than raw arm strength.
The key is refusing to treat the final image as the starting point.
Build wrist tolerance, master two-hand balances, learn controlled weight shifts, strengthen your shoulders and core, and gradually reduce assistance. When the fundamentals are strong enough, the Baki pose stops being a reckless viral stunt and becomes what advanced bodyweight training should be: a controlled demonstration of strength, balance, and skill.
