


When working on electrical systems, one of the essential tasks is to understand how to wire switches properly. Among the many products available, the Eagle 15-Watt 120-Volt WS896 Switches stands out as a reliable and user-friendly option. Whether you’re an electrician or a DIY enthusiast, understanding the wiring diagram and installation process for this switch is crucial for safe and efficient electrical setups.
In this comprehensive guide, we will cover everything you need to know about the Eagle 15-Watt 120-Volt WS896 Switches, including its features, technical specifications, and a detailed step-by-step wiring process. We’ll also dive into safety precautions, tools required, and common troubleshooting tips to ensure your wiring project goes smoothly.
Overview of the Eagle 15-Watt 120-Volt WS896 Switches
The Eagle WS896 is a low-wattage, 120-volt switch designed for a variety of residential and commercial applications. It is ideal for controlling small electrical loads, such as lighting fixtures, fans, or other low-power devices. This switch offers both single-pole and three-way configurations, giving users the flexibility to control a device from one or two locations.
1 Key Features of the WS896 Switch
- Voltage Rating: 120 volts
- Wattage Capacity: 15 watts
- Single-Pole or Three-Way Functionality: Can be configured for either single-pole or three-way operation, allowing for versatility in various electrical setups.
- Durable Design: Made with high-quality materials to ensure long-lasting performance and resistance to wear and tear.
- Easy Installation: Comes with user-friendly terminals for easy wiring and installation, even for those with limited experience.
2 Applications of the WS896 Switch
The Eagle 15-Watt 120-Volt WS896 Switches is commonly used in the following applications:
- Controlling lighting fixtures in homes or commercial buildings
- Powering small fans or exhaust systems
- Managing low-wattage appliances in workshops or garages
- Other small electrical loads requiring on/off control
Understanding Basic Electrical Switch Configurations
Before we dive into the wiring diagram for the Eagle WS896, it’s important to understand the two main types of switch configurations:
1 Single-Pole Switch
A single-pole switch is the most basic type of electrical switch. It controls one fixture or device from a single location. The switch has two terminals: one for the hot wire from the power source and one for the load wire that connects to the device being controlled (such as a light or fan).
2 Three-Way Switch
A three-way switch allows control of one fixture from two different locations. This setup is common in hallways or staircases, where a light can be turned on at one end and turned off at the other. A three-way switch has three terminals: one for the common wire and two for the traveler wires, which allow the switch to communicate with a second three-way switch in the system.
Safety Considerations Before Wiring
Electrical work can be dangerous if not done properly. Always follow these safety precautions before starting any wiring project:
- Turn Off Power: Always turn off the power at the circuit breaker before working on electrical circuits.
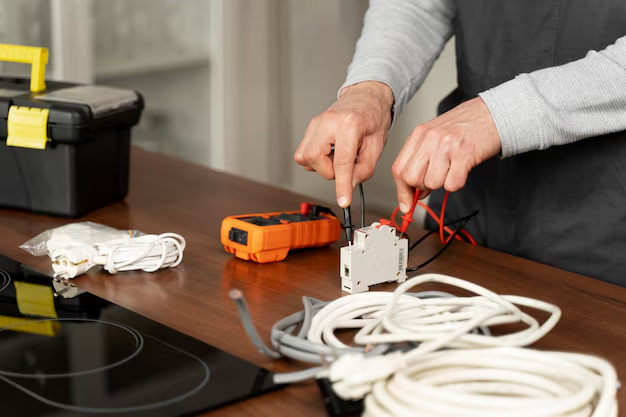
- Use a Voltage Tester: Verify that the power is off by using a voltage tester to check the wires before handling them.
- Follow Electrical Codes: Make sure your work complies with local electrical codes and regulations. If you’re unsure about any aspect of the installation, consult a licensed electrician.
- Wear Protective Gear: Use insulated tools and wear rubber-soled shoes to reduce the risk of electrical shock.
Tools and Materials Needed for Installation
To install and wire the Eagle 15-Watt 120-Volt WS896 Switches, you’ll need the following tools and materials:
- Screwdriver (flathead and Phillips)
- Wire cutters/strippers
- Voltage tester
- Electrical tape
- Wire nuts
- Mounting screws (usually included with the switch)
- Eagle WS896 switch
- Electrical box
Step-by-Step Guide to Wiring the Eagle WS896 Switch
Now that you’re familiar with the basics, let’s go through the step-by-step process for wiring the Eagle 15-Watt 120-Volt WS896 Switches.
1 Wiring a Single-Pole Switch
If you are wiring the WS896 switch as a single-pole switch, follow these steps:
Step 1: Turn Off the Power
Locate the circuit breaker that controls the circuit you’re working on and turn it off. Use a voltage tester to confirm that the power is off before proceeding.
Step 2: Remove the Old Switch
If you’re replacing an existing switch, remove the cover plate and unscrew the switch from the electrical box. Gently pull the switch out and disconnect the wires from the terminals.
Step 3: Prepare the Wires
Using wire cutters, strip about 1/2 inch of insulation from the ends of each wire. Ensure that the ends of the wires are clean and free from damage.
Step 4: Connect the Wires to the New Switch
- Hot Wire (Black): Connect the hot wire from the power source to one of the brass terminals on the Eagle 15-Watt 120-Volt WS896 Switches.
- Load Wire (Black): Connect the load wire (which leads to the light or other device) to the other brass terminal on the switch.
- Ground Wire (Green or Bare Copper): Attach the ground wire to the green grounding screw on the switch.
Read More = digital tech
Step 5: Secure the Switch
Carefully tuck the wires back into the electrical box and screw the switch into place. Attach the cover plate.
Step 6: Test the Switch
Turn the power back on at the circuit breaker. Test the switch by flipping it on and off to ensure that the connected device operates properly.
2 Wiring a Three-Way Switch
For a three-way configuration, follow these additional steps:
Step 1: Install the First Switch
In a three-way system, you will have two switches controlling the same light fixture or device. Begin by wiring the first switch:
- Connect the common terminal (usually black) to the wire coming from the power source.
- Connect the traveler terminals (usually brass) to the two wires that will run to the second switch.
Step 2: Install the Second Switch
At the second switch location, connect the common terminal to the wire leading to the light fixture or device. Connect the traveler terminals to the corresponding wires from the first switch.
Step 3: Grounding
Connect the ground wires at both switch locations to the green grounding screws.
Step 4: Test the Setup
Turn the power back on and test the switches to ensure they work in tandem. You should be able to control the light or device from both switch locations.
Wiring Diagram for the Eagle WS896 Switch
Below is a simplified wiring diagram for both single-pole and three-way switch configurations of the Eagle 15-Watt 120-Volt WS896 Switches.
1 Single-Pole Wiring Diagram
In a single-pole setup, the hot wire from the power source is connected to one terminal on the switch, while the load wire leading to the device is connected to the other terminal. The ground wire is connected to the green grounding screw.
[Power Source] ---> [Eagle WS896 Switch] ---> [Light Fixture]
6.2 Three-Way Wiring Diagram
In a three-way setup, the power source is connected to the common terminal on the first switch. The traveler wires run between the two switches, and the second switch is connected to the light fixture or device.
[Power Source] ---> [First WS896 Switch] ---> [Second WS896 Switch] ---> [Light Fixture]
Common Troubleshooting Tips
Even with the best planning, issues can arise during wiring projects. Here are some common troubleshooting tips for the Eagle 15-Watt 120-Volt WS896 Switches:
- Switch Not Working: Double-check that the power is turned on and that all connections are secure. Use a voltage tester to confirm that electricity is flowing through the circuit.
- Lights Flickering: This could be caused by a loose wire connection or a faulty light fixture. Check all wire connections and replace the light if necessary.
- Switch Feels Warm: It’s normal for switches to feel slightly warm during use, but if it becomes hot, there may be an issue with the wiring or the switch may be overloaded.
Conclusion
The Eagle 15-Watt 120-Volt WS896 Switches is a versatile and reliable option for controlling small electrical loads in both residential and commercial settings. Whether you’re wiring it as a single-pole or three-way switch, following the correct wiring procedure is essential for ensuring safety and functionality.
By following the steps outlined in this guide, you should be able to successfully install and wire the Eagle WS896 switch in your home or workspace. Always remember to follow proper safety procedures, use the correct tools, and consult with a licensed electrician if you’re unsure about any part of the installation process.